
How to inject GLP-1 peptides — step-by-step technique guide.
How to inject GLP-1 peptides is the question that causes the most anxiety for first-time users — and the one that turns out to be far simpler than expected. The vast majority of patients describe the injection as virtually painless once they learn the correct technique, and most are comfortable doing it independently after their second or third attempt. The needle is tiny, the injection is shallow, and the entire process takes under two minutes once you are practised.
This guide covers how to inject GLP-1 peptides from start to finish: the supplies you need, how to reconstitute lyophilised (freeze-dried) peptide powder, how to calculate and draw your dose, the correct subcutaneous injection technique, where to inject, how to rotate sites, how to store your reconstituted peptide, and the common mistakes that new users make. The advice here is consistent with standard subcutaneous injection guidance from the NHS.
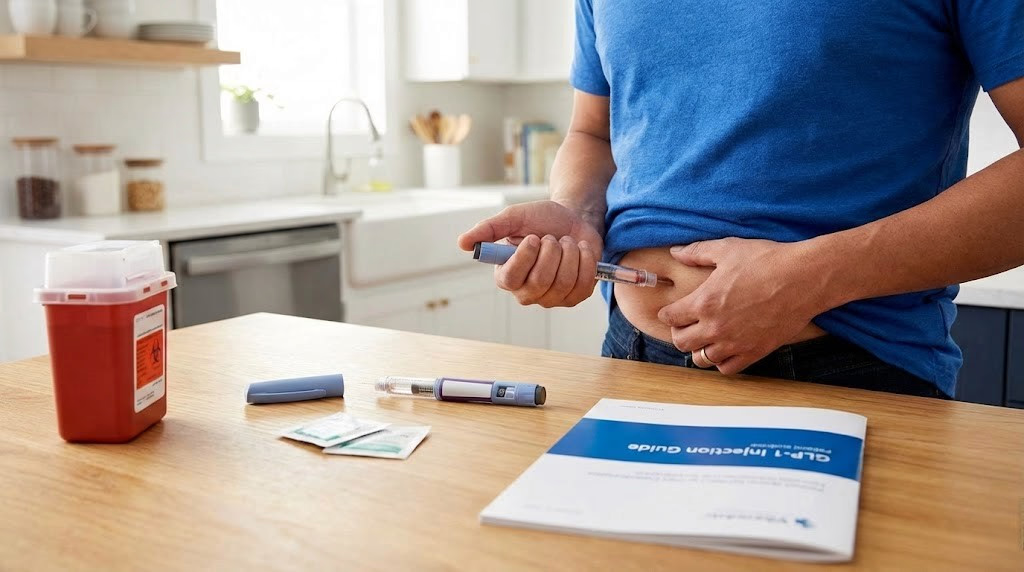
How to inject GLP-1 peptides — what you need
| Supply | Specification | Why |
|---|---|---|
| Insulin syringes | 1 ml, 29–31 gauge, 8–12.7 mm needle | Fine gauge for minimal pain; short length for subcutaneous depth |
| Bacteriostatic water (BAC water) | 0.9% benzyl alcohol preserved | Reconstitutes the peptide and prevents bacterial growth |
| Alcohol swabs | 70% isopropyl alcohol pads | Sterilises the vial top and injection site |
| Peptide vial | Lyophilised powder | Your GLP-1 peptide — semaglutide, tirzepatide, or retatrutide |
| Sharps container | Any dedicated sharps bin | Safe disposal of used needles |
When learning how to inject GLP-1 peptides, use 1 ml insulin syringes with 0.01 ml (10-unit) graduations. These give you the most accurate dosing — critical when working with potent peptides where a small volume change represents a significant dose change. The 29–31 gauge needle is virtually painless for most people. Larger syringes with wider graduations make accurate dosing much harder.
How to inject GLP-1 peptides — reconstitution
Before you can inject, you need to reconstitute your peptide — that is, add bacteriostatic water to the lyophilised (freeze-dried) powder to create an injectable solution. This is the step that looks most intimidating but is actually very straightforward once you understand how to inject GLP-1 peptides properly:
- Clean the vial tops: Swab the top of both the peptide vial and the bacteriostatic water vial with an alcohol pad. Let them air dry for 10 seconds.
- Draw bacteriostatic water: Insert the syringe needle through the rubber stopper of the BAC water vial. Turn the vial upside down and draw the required amount of water. The amount you add determines the concentration of your solution — more water means a more dilute solution, which makes accurate dosing easier.
- Add water to the peptide vial: Insert the needle through the rubber stopper of the peptide vial. Inject the water slowly down the inside wall of the vial — do not squirt it directly onto the powder. Let the water run down the glass and pool at the bottom around the powder cake.
- Dissolve gently: Gently swirl or roll the vial between your palms for 30–60 seconds. Never shake the vial. The peptide should dissolve into a clear, colourless solution. If any powder remains, let the vial sit in the fridge for 10–15 minutes and swirl again.
- Check the solution: Hold the vial up to light. The solution should be completely clear with no visible particles, cloudiness, or discolouration. If it looks cloudy or contains particles after gentle swirling, the peptide may be damaged — do not use it.
Shaking denatures (damages) the peptide’s molecular structure, reducing its effectiveness or rendering it inactive. Understanding how to inject GLP-1 peptides starts with understanding that these are delicate biological molecules. Gentle swirling dissolves the powder just as effectively as shaking — without the risk of damage. If it takes a few minutes to dissolve completely, that is normal. Patience here protects your investment.
How to inject GLP-1 peptides — calculating your dose
The volume you inject depends on the concentration of your reconstituted solution — which depends on how much bacteriostatic water you added and the total peptide content of the vial. This is the part of learning how to inject GLP-1 peptides that requires basic arithmetic:
The formula
Volume to inject (ml) = desired dose (mg) ÷ concentration (mg/ml)
Where concentration = total peptide in vial (mg) ÷ total water added (ml)
Example
You have a 5 mg vial of semaglutide. You add 2 ml of bacteriostatic water. Your concentration is 5 mg ÷ 2 ml = 2.5 mg/ml. If your prescribed dose is 0.25 mg, you inject 0.25 ÷ 2.5 = 0.1 ml (10 units on the syringe).
| Vial size | BAC water added | Concentration | 0.25 mg dose | 0.5 mg dose | 1.0 mg dose |
|---|---|---|---|---|---|
| 5 mg | 1 ml | 5 mg/ml | 0.05 ml (5 units) | 0.10 ml (10 units) | 0.20 ml (20 units) |
| 5 mg | 2 ml | 2.5 mg/ml | 0.10 ml (10 units) | 0.20 ml (20 units) | 0.40 ml (40 units) |
| 10 mg | 2 ml | 5 mg/ml | 0.05 ml (5 units) | 0.10 ml (10 units) | 0.20 ml (20 units) |
Adding more bacteriostatic water creates a more dilute solution, which means you inject a larger volume for the same dose. This makes measuring small doses much easier and more accurate. For beginners learning how to inject GLP-1 peptides, 2 ml of BAC water per 5 mg vial is a good starting point — it produces volumes that are easy to read on a standard insulin syringe without being so large that injections become uncomfortable.
How to inject GLP-1 peptides — step by step
- Wash your hands: Soap and water for at least 20 seconds. Dry thoroughly. This is the most basic infection prevention step in learning how to inject GLP-1 peptides — never skip it.
- Prepare the syringe: Swab the peptide vial top with an alcohol pad. Insert the syringe needle, turn the vial upside down, and slowly draw your calculated dose. Pull the plunger back slightly past your target volume, then push forward to your exact dose — this removes air bubbles from the syringe.
- Remove air bubbles: With the needle pointing upward, flick the syringe gently to float any remaining bubbles to the top. Push the plunger up slowly until a tiny drop appears at the needle tip and all air is expelled. Recheck your volume.
- Prepare the injection site: Swab your chosen injection site with an alcohol pad. Let it air dry completely — injecting through wet alcohol stings.
- Pinch the skin: With your non-dominant hand, pinch a fold of skin and fat at the injection site between your thumb and forefinger. Hold the fold gently throughout the injection.
- Insert the needle: In one smooth, quick motion, insert the needle at a 45 to 90 degree angle into the pinched skin fold. A quick, confident insertion is less painful than a slow, hesitant one. For most people and most injection sites, 90 degrees (straight in) is correct with an 8 mm needle.
- Inject the dose: Push the plunger down slowly and steadily. There is no rush — a slow injection is more comfortable and distributes the solution more evenly in the subcutaneous tissue.
- Wait 5–10 seconds: After pushing the plunger fully down, keep the needle in place for 5–10 seconds. This ensures the full dose is delivered and prevents the solution from leaking back out of the injection site.
- Withdraw and release: Pull the needle out smoothly. Release the skin fold. Do not rub the injection site — gentle pressure with a dry cotton pad is fine if there is a small drop of blood.
- Dispose safely: Place the used syringe directly into your sharps container. Never recap the needle or reuse a syringe.
How to inject GLP-1 peptides is a skill you learn once and use for the duration of your treatment. By the third or fourth injection, it becomes a two-minute routine that feels completely natural. The anticipation is always worse than the reality.
Patient experienceHow to inject GLP-1 peptides — where to inject
| Site | Location | Notes |
|---|---|---|
| Abdomen | Either side of the navel, at least 5 cm away. Avoid the navel itself and any scars. | Most popular. Consistent fat layer, easy access, reliable absorption. |
| Thigh | Front/outer upper thigh, middle third between hip and knee. | Good alternative. Slightly more tissue, may be more comfortable for some. |
| Upper arm | Back of the upper arm, between shoulder and elbow. | Harder to self-inject. May need someone to help. Good for rotation. |
Site rotation
Rotate your injection site with every injection. Do not inject in the same spot twice in a row. Repeated injections in the same location can cause lipodystrophy — hardened, lumpy, or indented areas of tissue that alter absorption and make future injections uncomfortable. A simple rotation pattern for learning how to inject GLP-1 peptides: left abdomen → right abdomen → left thigh → right thigh → repeat. Within each area, move to a slightly different spot each time — imagine a clock face and move to the next hour position.
How to inject GLP-1 peptides — storage after reconstitution
| Storage condition | Shelf life |
|---|---|
| Reconstituted with BAC water, refrigerated (2–8°C) | 28–30 days |
| Reconstituted with sterile water, refrigerated | 48–72 hours (no preservative) |
| Unreconstituted powder, refrigerated | Months to years (check expiry) |
| Unreconstituted powder, room temperature | Weeks to months (reduced stability) |
Bacteriostatic water contains 0.9% benzyl alcohol, which prevents bacterial growth in your reconstituted peptide. Sterile water for injection contains no preservative — bacteria can grow in the solution after reconstitution, making it unsafe for multi-dose use. Since most GLP-1 peptide vials contain multiple doses that are used over several weeks, bacteriostatic water is essential. This is one of the most important rules when learning how to inject GLP-1 peptides safely.
How to inject GLP-1 peptides — common mistakes
Shaking the vial during reconstitution
Shaking denatures the peptide. Swirl gently. If it takes 5 minutes to dissolve, that is fine. Learning how to inject GLP-1 peptides means learning patience at this step.
Injecting cold solution straight from the fridge
Cold solution stings more than room-temperature solution. Remove the vial from the fridge 10–15 minutes before your injection and let it reach room temperature naturally. Do not heat it — just let it warm on the counter.
Reusing needles
Needles are designed for single use. After one injection, the needle tip is dulled and the sterile coating is compromised. Reusing needles increases pain, increases infection risk, and can introduce bacteria into your peptide vial. Insulin syringes are inexpensive — use a fresh one every time.
Injecting into muscle instead of fat
GLP-1 peptides are designed for subcutaneous injection — into the fat layer beneath the skin, not into the muscle below it. Pinching a skin fold and using the correct needle length (8–12.7 mm) ensures subcutaneous placement. Intramuscular injection alters absorption speed and can cause more pain and bruising. Understanding how to inject GLP-1 peptides correctly means understanding the difference between subcutaneous and intramuscular depth.
Not rotating injection sites
Using the same spot repeatedly causes tissue damage. Rotate methodically — the few seconds of planning saves months of dealing with lumpy, hardened tissue that absorbs medication inconsistently.
Miscalculating the dose
Double-check your arithmetic every time. Write down your concentration and the volume required for each dose level. Tape it to your fridge or save it in your phone. A dosing error with a potent GLP-1 peptide can mean either an ineffective dose or an unnecessarily strong one with amplified side effects.
Learning how to inject GLP-1 peptides is like learning to drive — it feels overwhelming the first time, becomes routine by the third time, and eventually becomes something you do without thinking. The technique is simple. The confidence comes with practice.
Mymetabolism guidanceCommon questions — how to inject GLP-1 peptides
Quality peptides with full support.
HPLC-verified at 99% purity, COA on every batch, free UK shipping. From reconstitution guidance to dosing support — we are here for every step.
Browse products →