
How to inject Ozempic — 7 proven steps for your first injection.
Learning how to inject Ozempic correctly is one of the first things every new patient needs to master — and it is simpler than most people expect. Unlike the Mounjaro KwikPen auto-injector, the Ozempic pen requires a few extra steps: attaching a needle, performing a flow check, and dialling your dose. Once you have completed the first injection, the process becomes a quick, confident weekly routine. This guide walks you through every step of how to inject Ozempic safely and accurately.
Everything you need to know about how to inject Ozempic is in this guide. All steps follow the official Ozempic patient information leaflet from the Electronic Medicines Compendium (EMC) and the NHS Semaglutide injection guidance. Contact our 24/7 support team if you have any questions about your specific dose or pen before or after your first injection.
How Ozempic injection differs from Mounjaro
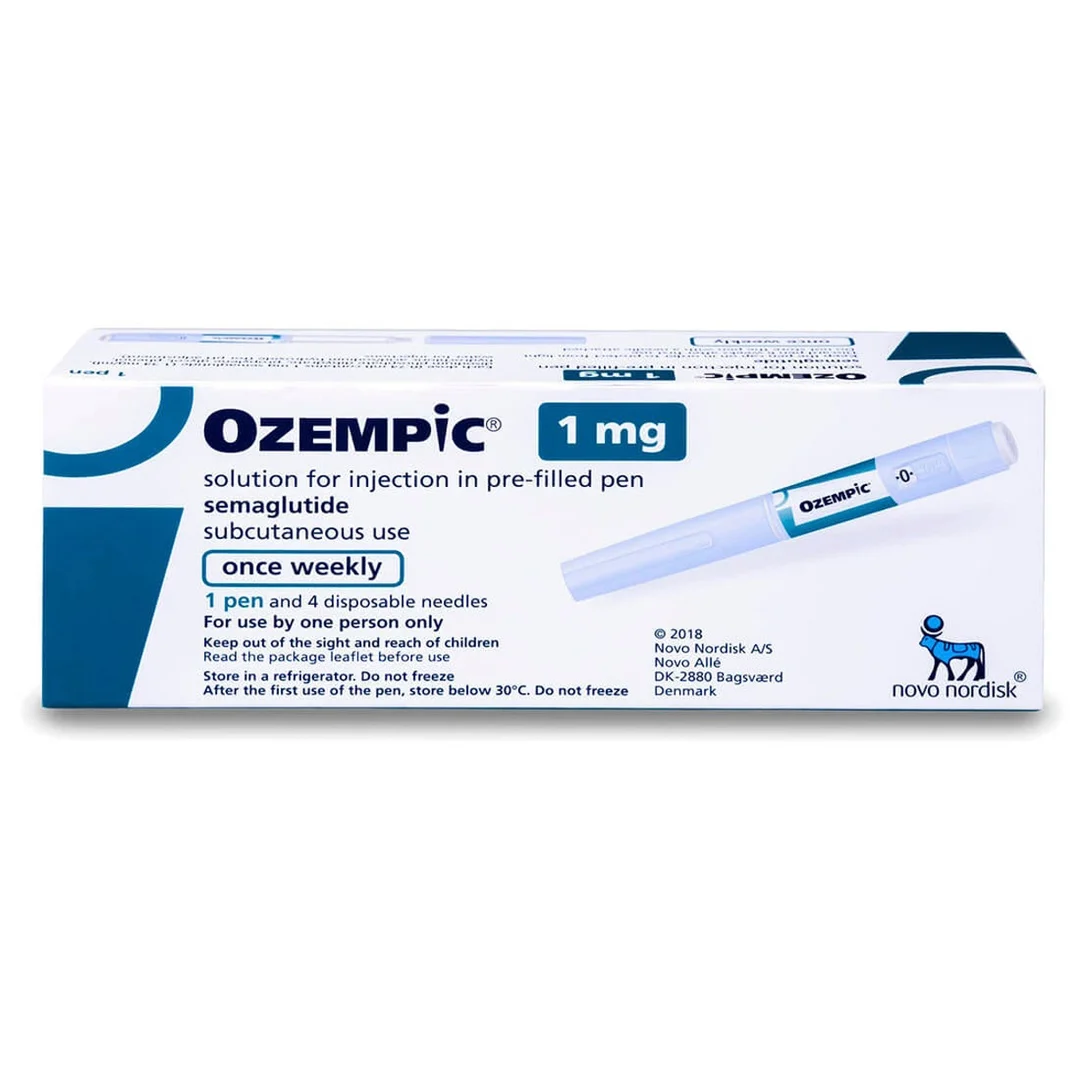
If you have previously used Mounjaro, it is important to understand that how to inject Ozempic differs in one critical way: the Ozempic pen requires you to attach a needle before each injection. The Mounjaro KwikPen is an auto-injector with a built-in needle that activates on contact. The Ozempic FlexPen requires a separate needle — typically a NovoFine or NovoTwist disposable pen needle — to be attached, flow-checked, and removed after each use.
This is not complicated — most patients are completely comfortable with the process after their first injection. But understanding the difference before your first Ozempic injection prevents confusion and ensures you have the right equipment ready.
For each Ozempic injection you need: your Ozempic FlexPen at the correct dose, a compatible pen needle (NovoFine Plus 32G or NovoTwist), an alcohol swab, and a sharps disposal container. Pen needles are not included with Ozempic — order them separately or request them from your pharmacist.
Before you inject Ozempic — preparation
The first step in how to inject Ozempic comfortably is preparation. Remove your Ozempic pen from the fridge 30 minutes before injecting. Cold medication is safe but can cause stinging. Allowing the pen to reach room temperature makes the injection more comfortable without affecting potency. Gather your needle, alcohol swab, and sharps container in a clean, well-lit area before beginning.
Check the medication window: the solution should be clear and colourless or very slightly yellow with no particles. If it appears cloudy, discoloured, or contains visible particles — do not use the pen. Contact our support team for a replacement.
7 proven steps to inject Ozempic
Follow these seven steps every time you inject Ozempic. The process takes approximately three minutes including preparation — slightly longer than Mounjaro because of the needle attachment steps.
Step 1: Wash your hands thoroughly
Wash your hands with warm soapy water for at least 20 seconds and dry completely with a clean towel. This is the most important hygiene step before any subcutaneous injection and applies every time you inject Ozempic regardless of how clean your hands feel.
Step 2: Attach a new needle to the pen
Remove the pen cap. Take a new pen needle, remove the paper tab, and place it straight onto the pen tip. Twist the needle clockwise until it is securely attached — do not overtighten. Never use a needle that has been used previously. A used needle is blunted, increases infection risk, and may have air bubbles from the previous injection that affect dose accuracy.
Step 3: Perform the flow check (first use only)
If this is the first injection from a new Ozempic pen, a flow check is required to remove air from the needle before dosing. Remove the outer and inner needle caps. Turn the dose selector to the flow check symbol — two small dots. Point the pen upward and press the dose button until the selector returns to zero. A small drop of medication should appear at the needle tip confirming the pen is ready. If no drop appears, repeat up to six times. If still no drop, do not use the pen — contact our support team. On subsequent injections from the same pen, the flow check is not required.
Step 4: Select your dose
Turn the dose selector to your prescribed dose. The dose window will display your selected dose clearly. If you select the wrong dose, you can turn the selector in either direction to correct it before injecting. Double-check the displayed dose matches your prescription before proceeding to injection. Selecting the correct dose is a critical step when learning how to inject Ozempic accurately.
Step 5: Choose, clean and prepare your injection site
Select your injection site from the three approved areas — abdomen, outer thigh, or upper arm. Choose a different site from your previous injection. Clean the area with an alcohol swab using a circular motion and allow to air dry completely for at least 10 seconds. Do not blow on the area to dry it. If desired, pinch a fold of skin gently between thumb and forefinger — this can make the injection more comfortable, particularly for patients with lower body fat.
Step 6: Insert needle and press dose button — hold for 6 seconds
Insert the needle straight into the skin at a 90-degree angle — or 45 degrees if instructed by your healthcare provider for very lean individuals. This is the most important mechanical step when you inject Ozempic. Press the dose button firmly and completely down. Keep pressing while you count slowly to six. You will see the dose counter move to zero — do not remove the needle until it reaches zero and you have held for the full six seconds. Removing the pen early is the most common cause of incomplete dose delivery. Continue holding for the full count before withdrawing smoothly.
Step 7: Remove needle and dispose safely
Withdraw the needle straight out of the skin. Apply gentle pressure with a clean swab if there is minor bleeding — do not rub. Remove the needle from the pen immediately after injection — never leave a needle attached between injections as this causes air to enter the pen and affects subsequent doses. Place the used needle directly into your sharps container. Replace the pen cap and store as appropriate. Log the date, dose, and injection site for your records.
A small drop of blood or clear fluid at the injection site after withdrawing is completely normal. Apply light pressure with a clean swab — do not rub. The medication has already been delivered subcutaneously and brief surface bleeding does not affect dose delivery when you have held for the full six seconds. Contact our 24/7 support team if you experience anything unusual after your injection.
Ozempic injection sites — where to inject
Ozempic is approved for subcutaneous injection into three body areas. Each has specific guidelines:
- Abdomen — the most popular site. Inject into fatty tissue at least 5cm from the belly button in all directions. Avoid the waistband area and any skin with active irritation. The abdomen generally provides the fastest and most consistent absorption
- Front and outer thigh — inject into the outer, upper portion of the thigh. Avoid the inner thigh and the area near the knee. A valid and comfortable alternative for patients who find the abdomen uncomfortable
- Back of upper arm — inject into the fatty tissue at the back of the upper arm. May require assistance to reach. Never inject into the front of the arm or near the shoulder joint
You can inject Ozempic and Wegovy into the same body region as each other if taking both — but do not inject into the exact same spot on the same day. Ozempic and insulin can also be injected in the same body region but must not be mixed or injected at the same site.
Injection site rotation for Ozempic
Rotating injection sites is essential for preventing lipodystrophy — fatty lumps under the skin that impair absorption and affect dose consistency. Move at least 1 to 2cm from the previous injection spot within the same site, or alternate between sites on a weekly rotation:
- Week 1: right side of abdomen
- Week 2: left outer thigh
- Week 3: left side of abdomen
- Week 4: right outer thigh
- Week 5: return to week 1 position
This four-site rotation gives each area at least three weeks to recover. Many patients subdivide the abdomen into four quadrants for additional variation if they prefer abdominal injections.
How to store Ozempic
- Unopened pens: refrigerate at 2 to 8°C in the original packaging until use
- Pens in use: store at room temperature up to 30°C for up to 56 days — significantly longer than Mounjaro’s 21-day limit. After 56 days at room temperature, discard even if medication remains
- Never freeze: frozen Ozempic must be discarded immediately
- Protect from light: always replace the pen cap after use and keep away from direct sunlight
- Travelling: keep pens between 2 and 30°C. A soft insulin travel case or cool bag with ice pack is suitable for short journeys
Common Ozempic injection mistakes to avoid
- Not holding for the full 6 seconds — the most common cause of incomplete doses. The dose counter must reach zero and you must hold for six full seconds before withdrawing
- Leaving the needle attached between injections — causes air to enter the pen cartridge, which can create air bubbles affecting subsequent doses. Always remove the needle immediately after injection
- Reusing needles — blunts the needle tip causing pain, increases infection risk, and may introduce air bubbles. Use a new needle for every injection without exception
- Skipping the flow check on first use — air in the needle from a new pen must be cleared before the first dose. Skipping this step can result in an inaccurate first dose
- Injecting cold medication — not dangerous but unnecessarily uncomfortable. Allow 30 minutes at room temperature before injecting
- Injecting too close to the belly button — stay at least 5cm away in all directions. The periumbilical area has a different tissue structure and higher nerve density
- Forgetting to log the injection — keeping a record of date, dose, and site prevents accidental double-dosing and helps track your rotation schedule accurately
If you have further questions about how to inject Ozempic, our 24/7 support team is always available. Read our verified customer reviews and browse our full product range including Ozempic alongside Wegovy, Mounjaro, and Retatrutide. For the equivalent guide for Mounjaro users, see our How to Inject Mounjaro guide.
Common questions about how to inject Ozempic
Ready to start your Ozempic treatment?
HPLC-verified at 99% purity, COA on every batch, free UK shipping. Our 24/7 support team guides you through every injection from day one.
Buy Ozempic now →